I was raised to be crafty. My mom taught me to sew, knit, quilt, and generally be artistic in everything I did. School projects were mini art projects, even though I was not terribly skilled at art. As I got older, I made friendship bracelets and tried to draw and sketch, but I mainly have excelled at assemblage: assembling multiple mediums in works of art that are personal and expressive rather than “realistic.” I am a crafter!
Since having kids, I’ve had a lot less time to be crafty; I was recently inspired to pick up my crafts again after meeting Ramie Smith who runs our GrokNation YouTube channel and is an expert crafty woman. At our Grok Nation retreat, we made a “coat of arms” representing our website goals and that also inspired me.
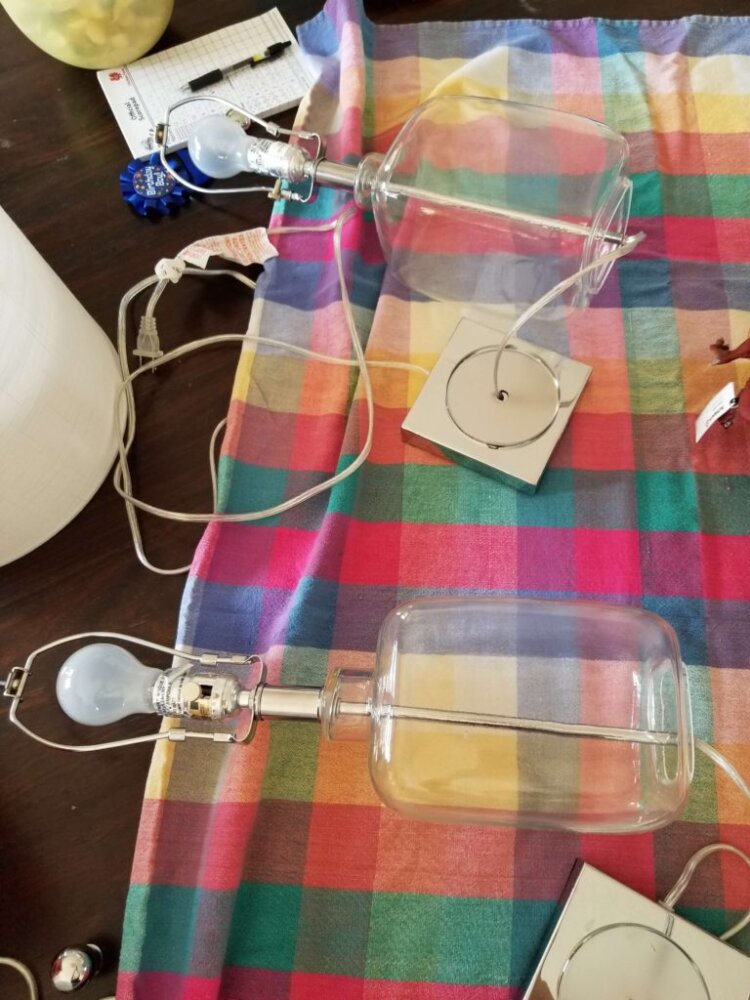
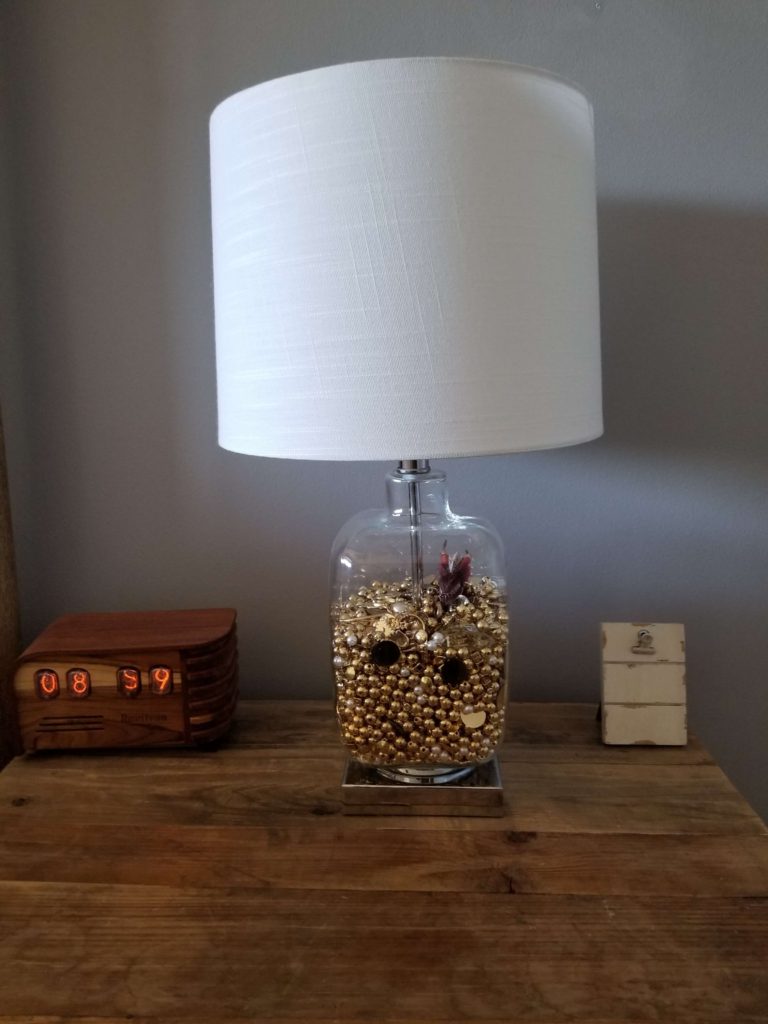
So… I decided to make a lamp depicting Smaug’s lair, the dragon’s den that figures prominently in Tolkien’s The Hobbit. Or rather, I assembled it, with the help of my best buddy. It took about 2 hours. The costs were the lamp which I got on sale from a lamp store (it’s made to be opened up so that you can decorate and customize it). The supplies came to about $100. You can for sure do this for cheaper, but I selected a few specialty items for my lamp which drove the price up. (Just being honest!) Here’s how we did it:
- I went to the craft store and bought a big collection of gold filler beads and gold miscellany the craft store had in stock: sequins, gems, junky pieces that were unwanted and in a box at the store – all of it gold.
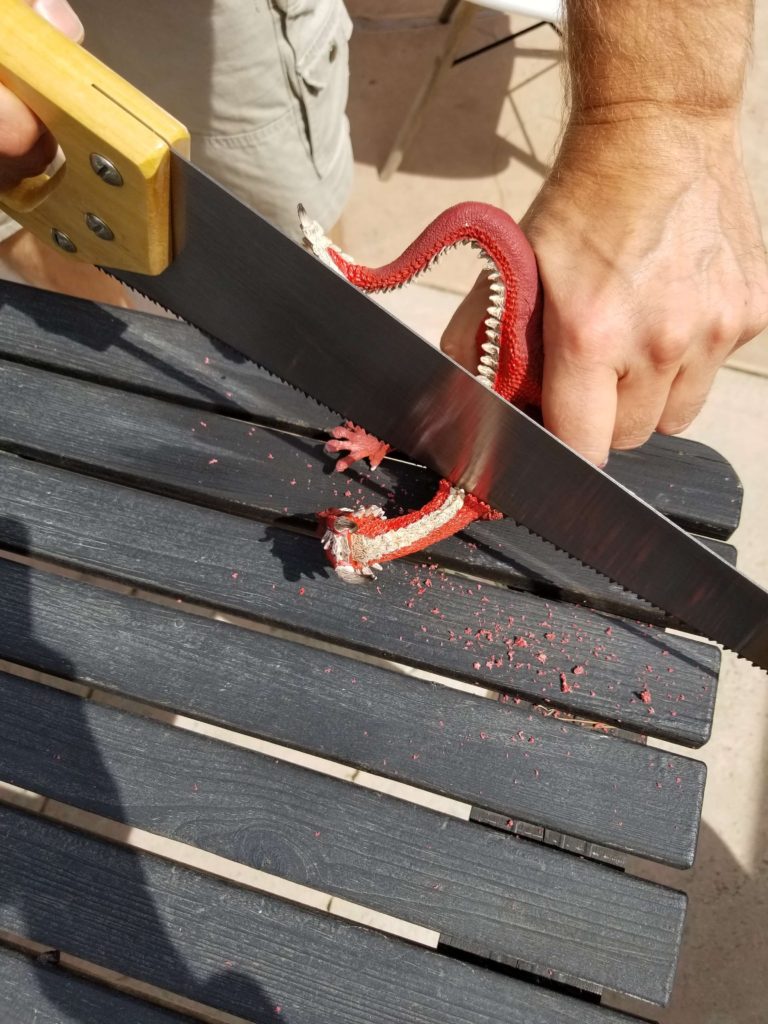
- We found a very detailed red dragon figurine online. This took some time; I didn’t want a cheesy chintzy low-detail dragon; I wanted something that looked like the real deal! Then, we sawed his poor little head off. I got weirdly sad about that. Like, even though he’s just a pretend dragon, it was sad to see his little body laid on a table with a saw to it. Am I weird? Yes.

- We mounted his decapitated dragon head on a chopstick which also made me weirdly sad. Like, now we were displaying his head as if we conquered his village and were posting his head for all to see! But knowing he would soon be surrounded by gems and gold made me feel better. We positioned the chopstick in the lamp from the bottom and angled it how we wanted it and taped it in place.
- We placed a fake “Arkenstone of Thrain” (shout out to The Hobbit!) in what would eventually be the top of the lamp. In the Hobbit, the Arkenstone is this highly prized holy stone that everyone wants and the dragon Smaug is guarding it and will destroy anyone who tries to take it. Super high stakes with the Arkenstone!
- I cut the top off of a party hat to make a funnel and we filled the lamp with the gold goodies, placing the Arkenstone and a few other special items I wanted to make sure would show at the top.
- We put the bottom back on and flipped it over. Voila! We have a Smaug’s lair lamp now!
This was an incredibly gratifying project. I can’t wait to work on our next lamp – it was a two for one sale! Stay tuned….!


 Read More From Mayim
Grok Nation Comment Policy
We welcome thoughtful, grokky comments—keep your negativity and spam to yourself. Please read our Comment Policy before commenting.